Slideshows are managed under images. To create or manage a slideshow, open up the images manager in your toolbar. Hover over the magic wand icon on the top right corner of your canvas when in block mode, and click on the images icon

Creating a slideshow
To create a slideshow, click on “My Slideshows” in your images manager. Click on the “New Slideshow” button to create a new slideshow.
Once you’ve created a slideshow, you can go ahead to add as many slides to it as you want.
Working with slides
Adding slides to a slideshow
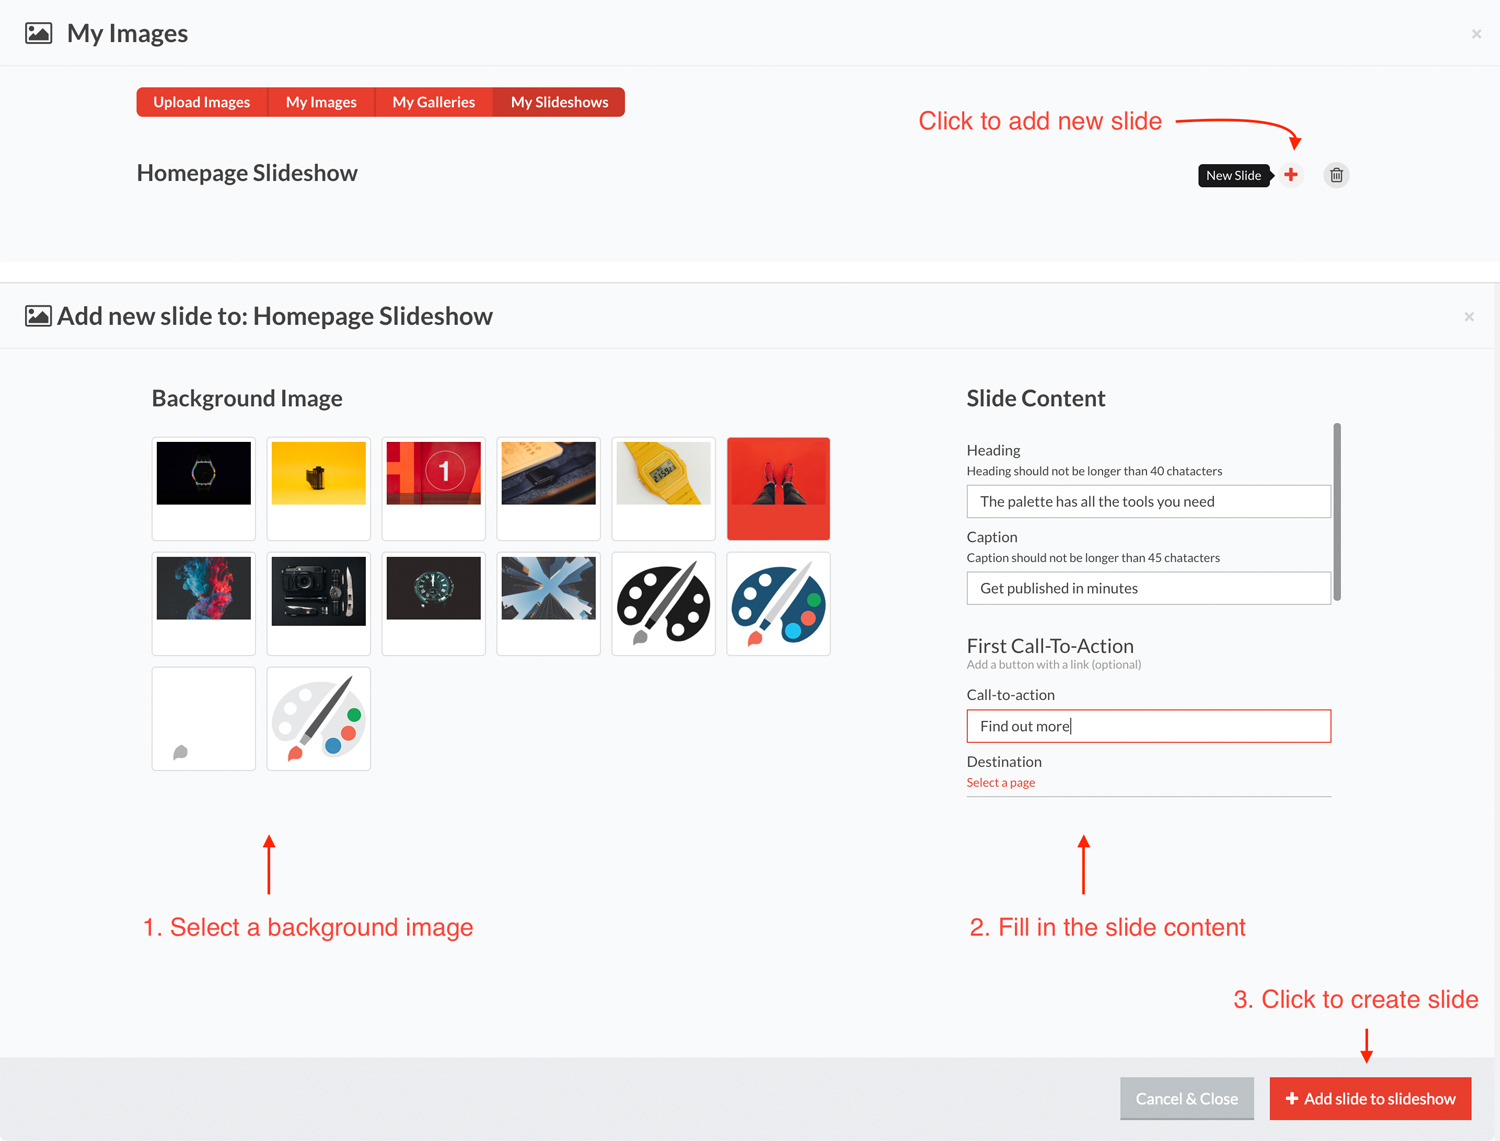
To add slides to your slideshow, click on the “+” button on the slideshow you are working on. Select the background image, and fill in the content for the slide.
Modifying & deleting slides
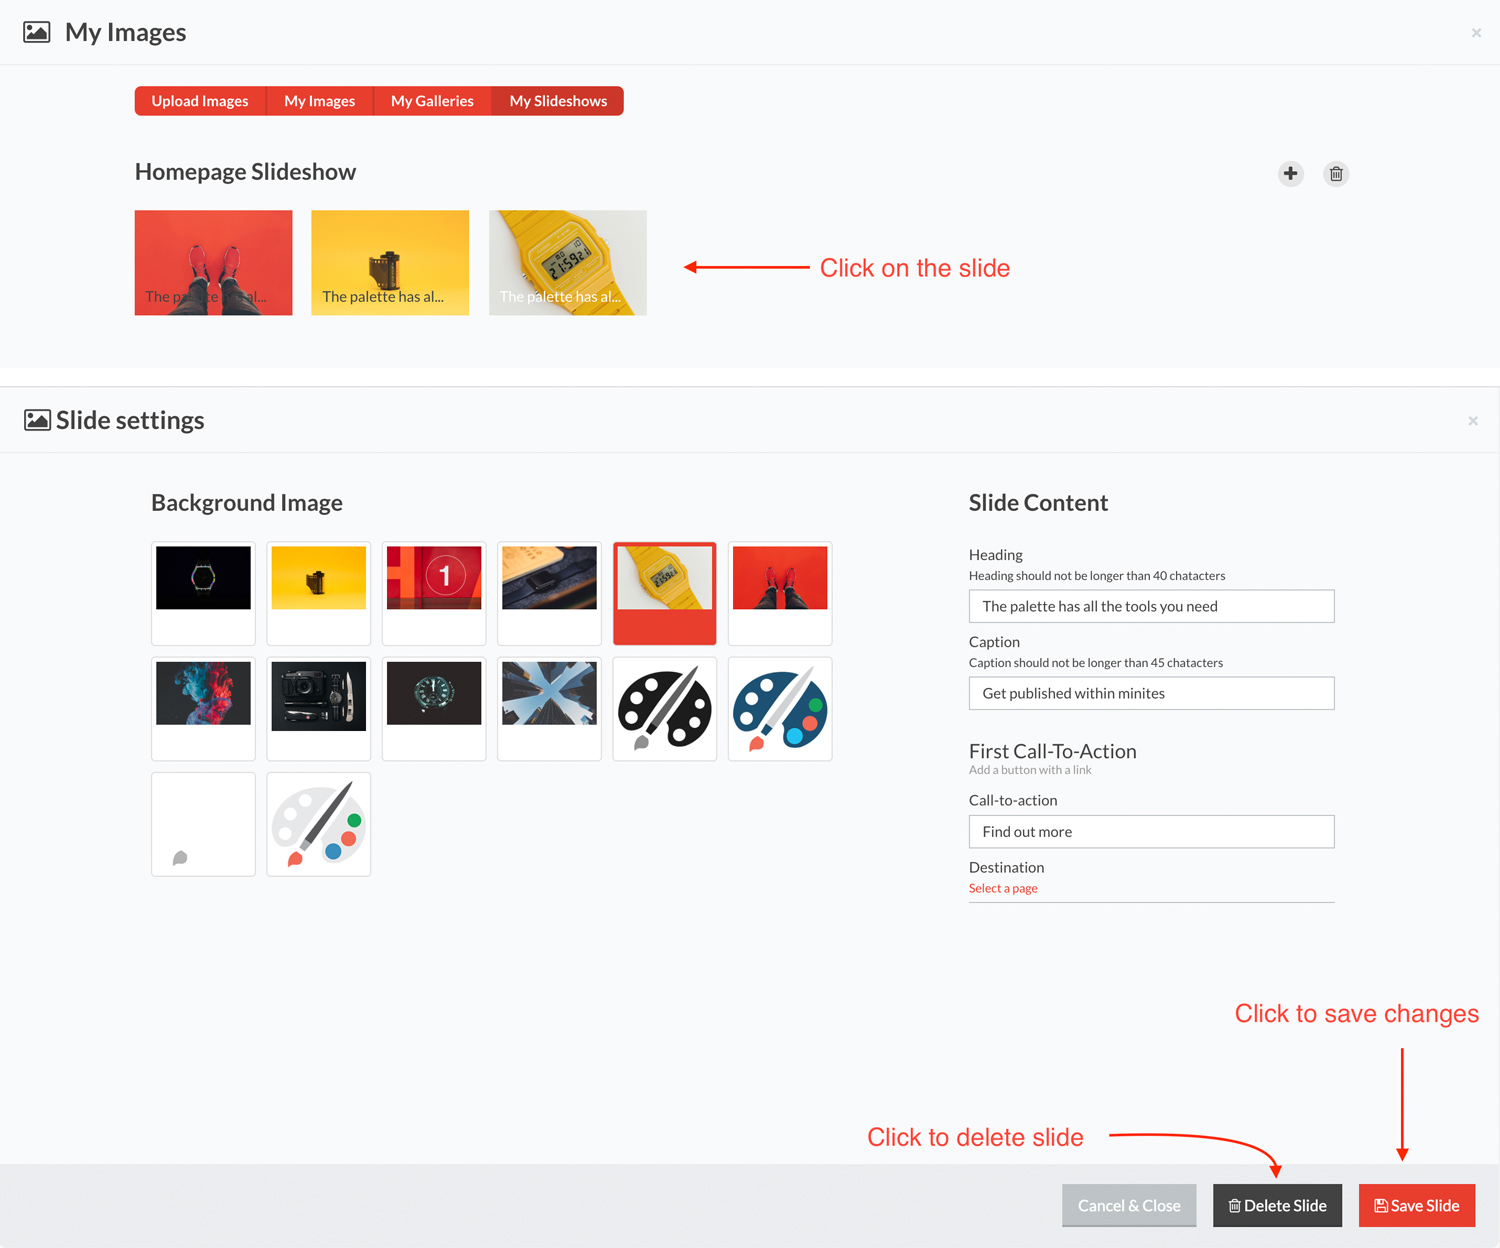
To change the content or background image of a slide, or to delete the slide, click on the slide you want to work on. You can select another image, change text, and / or call-to-actions. Click the delete button if you want to delete the slide.
Applying a slideshow to a header
When you are done working on your slideshow, you must apply it to the header.
To apply a slideshow, click on the header while in edit mode, ans select the slideshow you want to apply from the drop-down list.
When a slideshow is applied, it takes on the design of the first slide of the current slideshow (that is why the first slide can be edited in the your canvas).
If you want to change the fonts, font size, or button types in your slideshow, you should edit the first slide to your liking before applying your slideshow.